How to Propagate Pothos Clippings
Making Plants Make More Plants, or How to Grow a Plant In A Soup Container
This entire document is dedicated to teaching you how to grow a new plant from a pothos clipping. I recently trimmed a really long pothos I have (it was approximately 11 feet long), and put out a call on twitter to take the growth, so that I didn’t have to throw it away. Many people responded, and I promised a guide on how to make magic from plant scraps. A warning: there are no markets here, we’re practicing Offline Thought today.
If you want some clippings and didn’t get any, you can always message me. It’s a great summer project for kids, or if you just want something to do.
So… how do you actually grow a pothos from this tiny scrap? Easily. In fact, it’s only two steps:
Put clipping in water
Plant when roots grow
And that’s it! Guide over.
If you’ve propagated plants before, I hope I made you laugh. For the uninitiated, we’re laughing because it really is that easy. I promised a guide that makes it easy enough that a complete beginner can handle it.
You’re going to need a few things to get started:
A vessel for your immature plant to live in. Generally speaking: a cup.
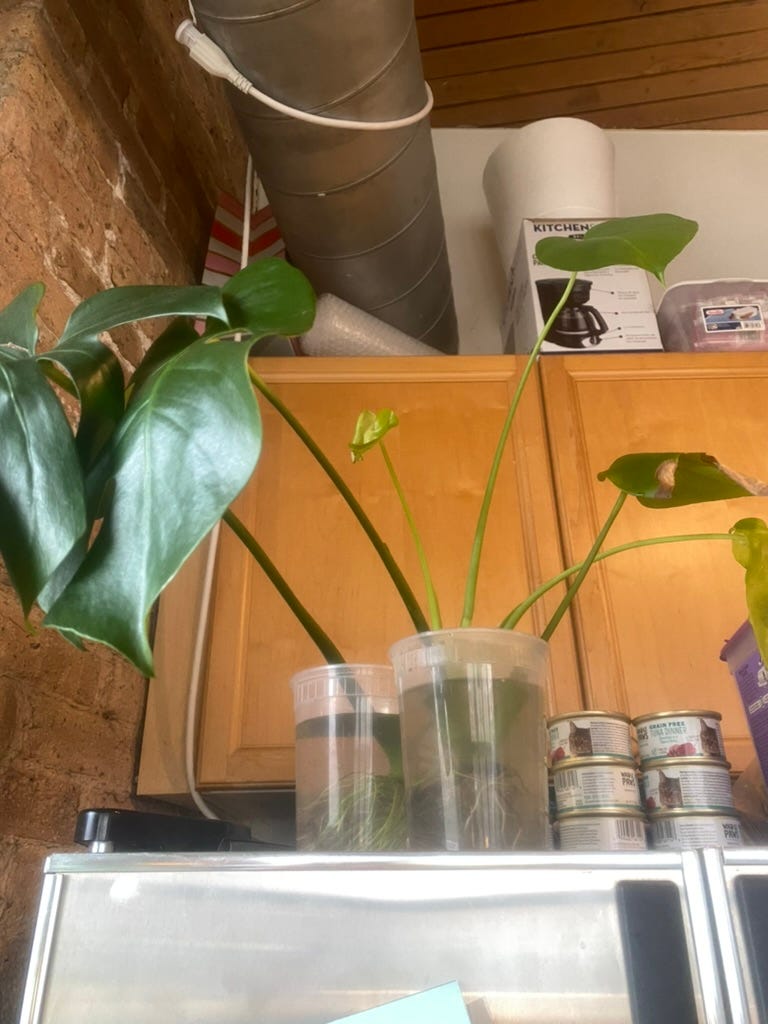
I have used plastic cups from bars, mason jars, every kind of cup you can find in my kitchen, and in one case, an actual bowl. Here is a terrible photo of the top of my fridge, where I have propagated monstera deliciosa in takeaway containers.
There is some argument on the internet over if you should use a transparent (glass) cup, or an opaque one, but I don’t find that it matters.
The most important thing here is to use a vessel deep enough that you can put the clippings in, cover the nodes with water, and have a few inches for healthy root growth. More details on all of that in a second.
Water
If you absolutely must, it’s okay to fill the aforementioned vessel with water straight from your tap, and then stick the plant clippings in.
If you can, fill the vessel up with tap water ahead of time, and let it sit out for 12+ hours. This is because your tap water is treated, generally with at least some chlorine. In most cases, this would be a good thing, but in this particular case, plants + chlorine = bad, so we don’t want that.
Your vessel + water will need to be refilled. Plants are thirsty. If you keep an eye on it, you won’t need to add much water, just a little bit at a time to top off. It’s a good idea to set some water out in anticipation of this, so that the water has time to react with the air, and dechlorinate.
Light
You don’t need a lot of light. You don’t even need any direct light1. Pothos are OK with low light, though they will be happier the more you can give them.
The best light will be found in a south facing window. East facing windows will get gentle morning sun. West facing windows will get more intense afternoon sun. North facing windows are sad and get the least amount of light (this is relative, all of my plants are in a north facing window, including the mother pothos these clippings came from.)
A safe space
Don’t let the cats or kids nibble on pothos, they are toxic. They are not so toxic that they will die if they look at the plant, but chewing on it is a really bad idea. Find a safe spot. Somewhere like a high bathroom window would work well. Get creative.
I taught my cat to stay away from the pothos by spraying her with water every time she so much as looked at the pothos. If that doesn’t work, or your cat simply refuses to acknowledge your authority, you could try propagating this outside. I have never done this myself, but would advise anyone trying to put the plant somewhere that gets too much direct overhead sun, unless you can commit to checking the water levels every day - the roots should not be exposed to pure sun/air, so this could be tricky if you’re somewhere like Texas.
Now that you have the right materials, here’s the steps to start propagating:
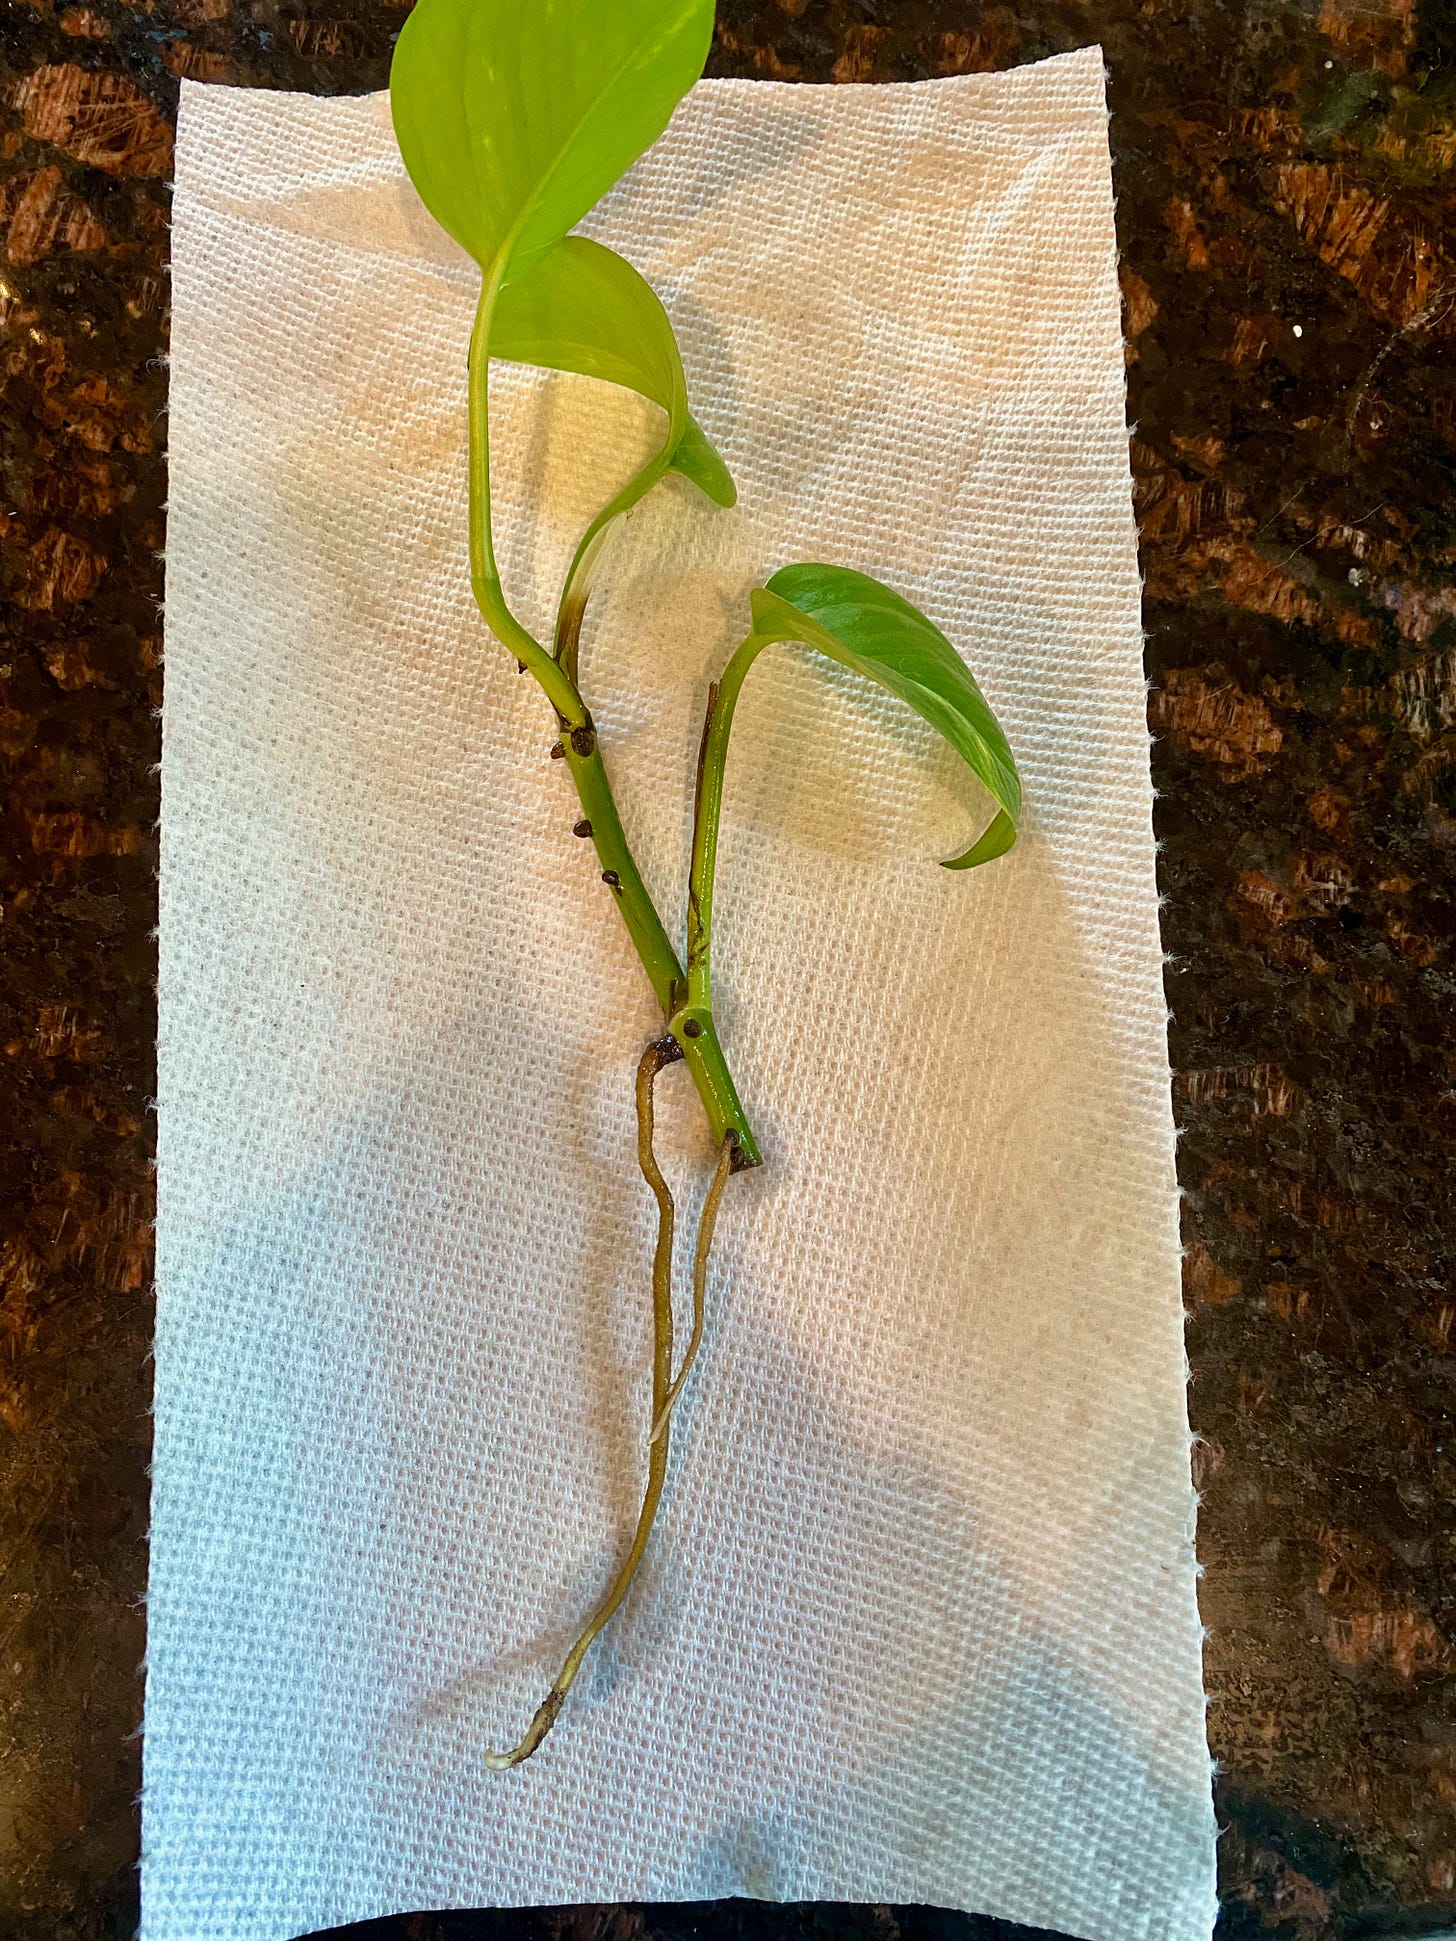
Remove the plant from the bag (gently). Be very careful removing the paper towel, as the plant may have roots.
Put the plant in the bowl/takeaway container/cup/vessel.
Fill with enough water to cover the nodes.
Wait.
When the roots are long enough, plant in potting soil.
When the plant starts vining, you can take your own clippings, propagate those, and replant in the same pot. After a few times, you should have a healthy, full pothos plant.
It really is that simple.
At this point you might be saying “excuse me, what’s a node?” or “how long is “long healthy roots?”, and those are fair questions, dear reader. There are, of course, a few more things you should know, because I used lots of words you might not be familiar with.
A node is the brown little nubby part of the plant, circled below.
This is where roots will come from. If there is growth that isn’t coming from here, it’s most likely leaf/vine growth, not roots, and you shouldn’t plant that.Your water levels need to be high enough that this part is submerged at all times. If your clippings have many nodes, it’s best to try and keep them all underwater, so that you have the best chances of rooting.
Plants do not grow at the same speed. They’re weird!
Here is a picture of a bunch of clippings I took at the same exact time, from the same plant, and propagated in the same space:As you can see, the roots are different lengths. Patience is key here: if your plant hasn’t started rooting, the solution is generally Wait Longer. I have only ever had a handful of clippings not root, and I propagate a lot of stuff.
Healthy roots are white or brown, and a little plump.
They might even look a little fuzzy, but they should be springy to the touch. You are ready to plant when you have a decent enough root system to support the plant, about 3 or 4 inches long.
This does not mean to plant the clipping as soon as a solitary root is 4” long - you want a little bit of a system to have developed. Planting a single root is okay, but it will make it harder for your plant to thrive. In the photo above, none of those clippings are ready to be planted. Here is an example of a clipping I probably should have planted already, but if I didn’t, you couldn’t have this cool helpful image:If you plant the cutting in soil, and after a few weeks, you notice it’s really struggling, you can always take the plant out of the dirt and put it back in water. This will help grow the roots.
I have a giant, awesome, healthy root system. Now what?
Once you’re satisfied with a nice, healthy plant, you can take a 4”2 pot, fill with potting soil, and gently pot the plant.
You do this by filling the pot up about halfway with soil, then putting the cutting in, roots first. While you don’t want to plant up to the leaf, you can cover a lot of the stem in dirt, so plan accordingly.
You should then fill the pot up with dirt, pushing down slightly to remove extra air from the dirt, but don’t push down hard enough to break a root or anything. You want the dirt compact, but with enough room in it that water will still be able to flow.
Place the plant in a sunny spot (the best spot would be the same one as where you propagated it, but that’s not always possible).
Water when the top inch of soil is dry - you can feel this out by sticking your finger in the dirt. If it is wet or cold up to your first joint, you don’t need to water. If the soil is dry, it’s time to be watered.
And that’s it! With some patience, you too can become a plant parent. If you get lost along the way, or want to ask a question, please reach out. I may respond slowly (I’m very introverted, believe it or not), but I will respond.
Direct light is when you can draw a straight line from the sun to your plant, and nothing comes in between that line that blocks or reduces light.
Pots are measured by their circumference. I wouldn’t go too much bigger than a 4” pot to start with, because you’d be watering mostly dirt, not the plant. A 5” pot should still be OK to start.


